

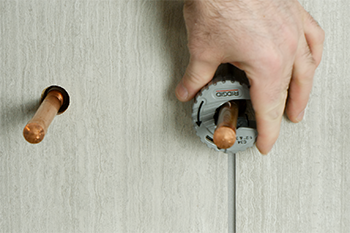
1/4-Turn Water Stop Valves provide easy on/off operation for controlling the flow of water and are designed for connections where a water line passes through a wall. Whether replacing or installing new, it is crucial to properly install and maintain your Stop/Shut off Valves.
Before you begin, make sure you choose the correct shut off valve. Don’t know how to choose? Check out our Oatey Stop Valves Overview video and jump to 0:32.
What You'll Need For This Project
- Oatey® 1/4-Turn Angle Water Stop Valve
- Adjustable wrenches
- Oatey Thread Sealant
- Expansion tool
- If working with ABS: Oatey All Purpose Cement
- If working with PVC: Oatey Primer and Oatey All Purpose Cement
- If working with CPVC: Oatey Primer and Oatey All Purpose Cement OR Oatey FlowGuard High Contrast 1-Step Medium Green Cement
- Crimping tool
Step 1. Remove Old Valve (if necessary)
If you are replacing an existing fixture, start by removing the existing valve. If you are installing something new, you can skip to Step 2.
To remove the existing valve, start by turning off the water supply. Remove the valve and ensure existing nuts, ferrules and stiffeners are removed from the stub out pipe.
Note: For iron pipe connections, remove the valve using two wrenches. For copper sweat and PEX connections, cut off the valve completely.
Step 2. Prepare the Stub Out
Before you install your stop valve, prepare the stub out. First, cut the pipe to the desired length using the correct tool/cutter for your material, then flush the line.
Note: Ensure the pipe is rounded and free from burrs, grooves, scars and abrasions.
Step 3. Determine Connection Type
Determine your valve’s connection type. Find the correct connection below and follow the correlating instructions.
A. PEX Crimp Connection
For PEX crimp connection, slide the PEX F1807 crimp ring over the tubing. Follow the PEX manufacturer’s instructions for installation of the valve inlet.
B. Copper or PEX Compression Connection
Slide the compression nut, then compression sleeve, onto the pipe end. Then, slide the valve body onto the pipe end until it bottoms out.
Thread the compression nut onto the male threads of the valve body. Then, using two adjustable wrenches, tighten the compression nut until the sleeve compresses onto the tubing. Finally, give it one more half turn.
Note: Do not use pipe joint compound or thread sealant tape on threads.
C. Female Iron Pipe Connection
For valves connected by iron pipe, apply thread sealant onto the male threads of the nipple or adaptor. Thread the valve onto the male threads.
Using two adjustable wrenches, hold back on the nipple or adaptor. Tighten the valve body to a watertight position so that the valve aligns with the inlet connection on the fixture.
D. Copper Sweat Connection
For copper sweat connection, clean and flux the end of the stub out pipe and the inside of the fitting using a sand cloth, open mesh or emery pad with Oatey No. 5 Paste Flux. Push the valve onto the pipe, then align the valve so the outlet is facing the end connection point. Finally, apply heat and solder.
Note: Do not move the valve until the solder connection has hardened.
E. CPVC Connection
For CPVC connection, apply primer and cement, or approved one-step cement, to the pipe end and inside valve hub. Push the valve onto the pipe end.
Note: Follow solvent cement manufacturer instructions on cure time prior to testing.
F. Cold Expansion PEX Connection
For cold expansion PEX connection, slide the PEX ring over the tubing.
Use an expansion tool to prepare the pipe. Once the pipe is expanded, insert the barbed end of valve into the pipe end. Hold it in place until the pipe has contracted.
G. Push Connection
For push connection, mark ¾ of an inch from the end of the stub out pipe. Firmly push the valve onto the pipe, ensuring it is seated in place and its collar has met the ¾ inch marking. Do not twist or adjust the valve while under water pressure.
Note: Keep the safety clip on the valve at all times, unless removing the valve.
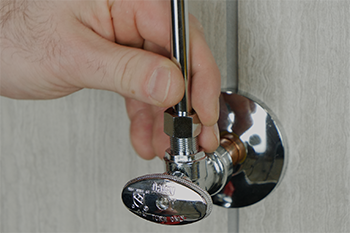
Step 4. Position the Valve
After installing any quarter-turn stop valve, position the valve to receive the water supply tube. Place the nut and sleeve on the supply tube and tighten the compression nut to the valve securely.
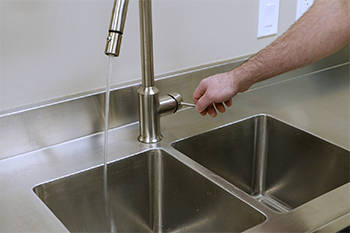
Step 5. Test and Maintain
Test the installation to ensure success and plan to inspect the valve annually.
Document Downloads (3)
Published on June 22, 2023