How to Install a Supply Box: Complete Step-by-Step Installation Guide


A supply box installation ensures a reliable water or gas connection for washing machines, ice makers, dryers and other fixtures. This comprehensive guide walks you through the complete process of installing a supply box, from selecting the optimal location to testing for leaks. Whether you're installing a fire-rated MODA box, standard supply box, or gas supply box, follow these professional steps for a secure, code-compliant installation.
What is a supply box and why do you need one?
A supply box (also called a washing machine outlet box or appliance supply box) is a recessed fixture that houses water supply valves, drain connections, and sometimes gas connections for appliances like washing machines or dryers. Installing a supply box properly prevents water damage, ensures code compliance, and provides easy access for maintenance and repairs.
Key benefits of installing a supply box include:
- Centralized water, drain, and gas connections in one location
- Protection against water leaks and flooding
- Clean, professional appearance with concealed plumbing
- Easy appliance installation and removal
- Compliance with building codes and manufacturer specifications
What You'll Need For This Project
Before beginning your supply box installation, gather these essential tools and materials:
Required Tools:
- Tape measure
- Pencil for marking
- Screwdriver or power drill with appropriate bits
Required Materials:
- For Oatey MODA Gas Supply Box
- Hercules MEGA BUBBLE (for gas leak detection)
- For Standard and Fire-Rated MODA Boxes:
For additional supply box kits, such as an ice maker outlet box, a washing machine water supply box, and more, you can view all Oatey MODA and supply box products here.
Step 1. Choose the Right Location for Your Supply Box
The location of your supply box determines accessibility and functionality for years to come. Select a spot that is easily accessible and positioned close to the fixture or appliance.
Best practices for supply box placement:
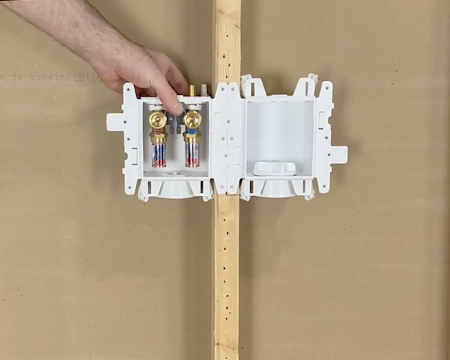
- Position the box between wall studs for secure mounting
- Ensure the location allows easy access for future maintenance
- Check the fixture manufacturer's specifications for recommended placement
- Verify the location doesn't interfere with electrical wiring or other plumbing
- Consider the appliance's water supply and drain hose lengths
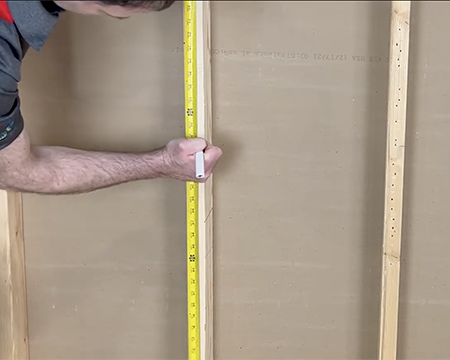
Step 2. Measure and Mark the Height
Proper height placement prevents installation issues and ensures optimal appliance performance. Use a tape measure and pencil to mark the ideal height on the wall stud.
The standard supply box height measurement for washing machine supply boxes is 36-42 inches from finished floor to bottom of box.
Always verify the appliance manufacturer's recommended height specifications before marking your installation point.
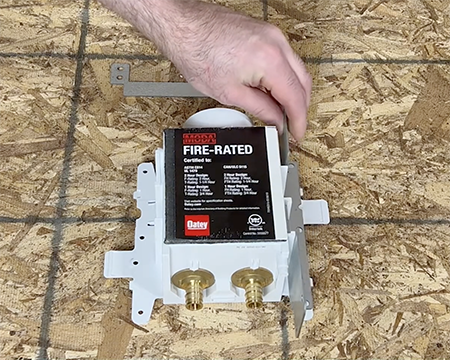
Step 3. Prepare the Supply Box for Installation
Preparation varies depending on whether you're installing a fire-rated MODA box or a standard supply box.
For fire-rated MODA boxes:
- Slide the large metal bracket onto the side of the box that will attach to the stud
- Insert the L-Bracket through the slots at the top of the box
- Position the L-Bracket at an upward-facing right angle for proper support
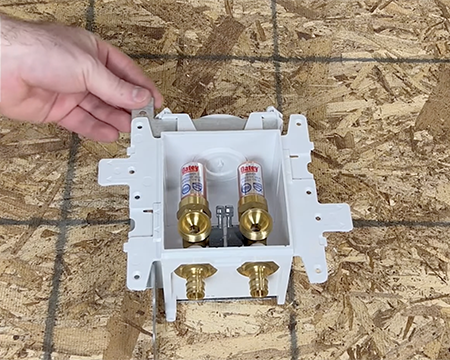
For non-fire-rated MODA boxes:
- Install plastic mounting brackets on the side of the box
- Ensure brackets are firmly attached and properly aligned
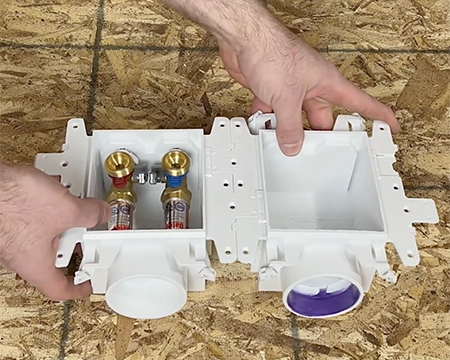
Pro tip: If you're installing multiple MODA boxes side-by-side (common for washer/dryer combinations), they can be clipped together for a unified installation.
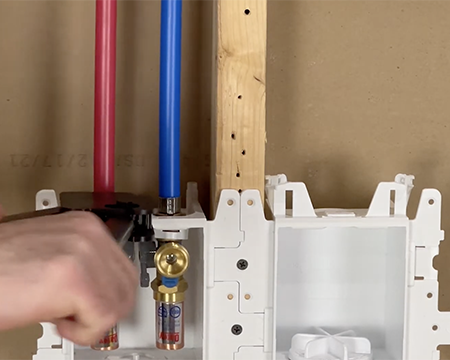
Step 4. Align and Secure the Box to the Wall Stud
Proper mounting ensures your supply box remains stable under the stress of connecting and disconnecting appliances.
Installation steps:
- Carefully align the supply box with the marked measurement on the stud
- Hold the box level against the stud
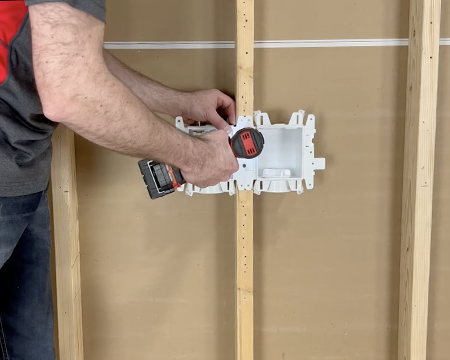
- Use screws to firmly secure the box through the mounting brackets
- Drive screws into the center of the stud for maximum holding power
Critical checkpoint: Thoroughly check the tightness of all screws and confirm there's no looseness in any part of the supply box. A loose supply box can lead to connection failures and water damage.
Step 5. Connect the Drainpipe to the Supply Box
Note: Skip this step if you're installing a gas-only or valve-only MODA box.
For standard and fire-rated MODA boxes with drain connections, proper solvent welding creates a watertight seal.
Drainpipe connection process:
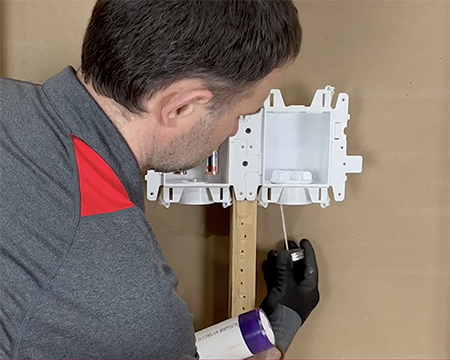
- Apply Oatey Purple Primer to both the box hub and the drainpipe end
- Apply Oatey Heavy Duty Clear PVC Cement to both primed surfaces
- Immediately insert the drainpipe into the box hub
- Hold firmly for 30 seconds to allow initial bonding
- Allow the connection to cure according to cement manufacturer specifications (typically 15 minutes before handling, 2 hours before pressure testing)
Step 6. Solvent Weld the P-Trap
Note: Skip this step for gas-only or valve-only MODA boxes.
The P-Trap prevents sewer gases from entering your home while allowing proper drainage.
P-Trap installation steps:
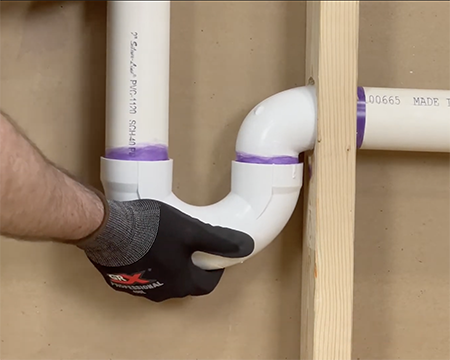
- Apply Oatey Purple Primer to the drainpipe and P-Trap connection points
- Apply Oatey Heavy Duty Clear PVC Cement to both surfaces
- Connect the P-Trap to the drainpipe, ensuring proper alignment
- Hold the connection firmly for 30 seconds
- Verify the P-Trap maintains proper orientation (trap should hold water)
Need help with solvent welding? Check out Oatey's solvent welding tutorial for detailed techniques and best practices.
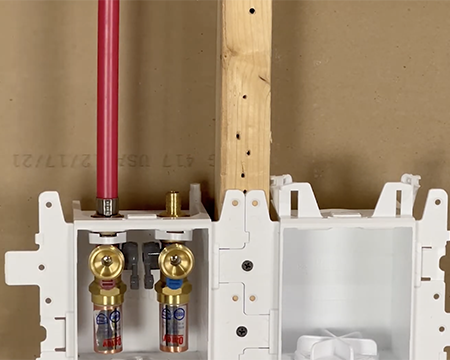
Step 7. Secure the Water or Gas Lines to the Supply Box
Secure connections prevent leaks and ensure safe operation of your appliances.
For water supply lines:
- Wrap threaded connections with thread sealant tape (3-4 wraps in the direction of threading)
- Hand-tighten the water supply lines into the hot and cold valves
- Use an adjustable wrench to tighten an additional quarter-turn
- Avoid over-tightening, which can damage valve threads
For gas supply lines:
- Use approved gas-rated flexible connectors or black iron pipe
- Apply pipe thread sealant rated for gas applications
- Tighten connections securely with appropriate wrenches
- Follow all local codes and safety regulations for gas installations
Step 8. Test the Supply Box for Leaks
Leak testing before closing walls prevents costly repairs and water damage. This critical step should never be skipped.
For water supply boxes:
- Turn on the main water supply
- Open the supply box valves fully
- Meticulously inspect all connections for signs of leakage
- Check for drips, moisture, or water accumulation
- Tighten any connections showing leaks
- Re-test after tightening
For gas supply boxes:
- Turn on the gas supply
- Apply Hercules MEGA BUBBLE leak detector to all connections
- Watch for bubble formation, which indicates gas leaks
- If bubbles appear, turn off gas immediately and tighten the connection
- Re-test until no bubbles form
- Ensure proper ventilation during testing
Safety warning: Never use open flames to test for gas leaks. Always use approved leak detection solutions.
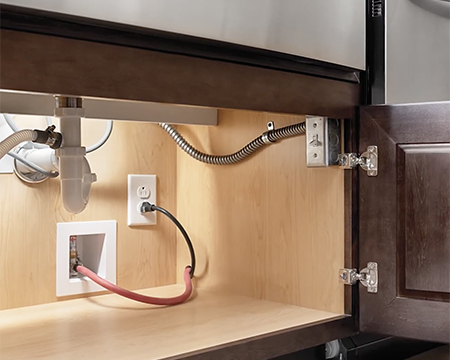
Step 9. Connect the Appliance or Fixture to the Supply Box
The final connection brings your installation full circle, providing water, drainage, and gas to your appliance.
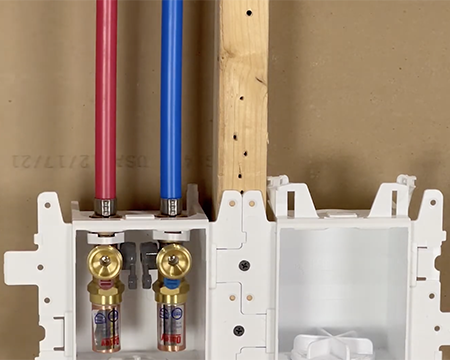
For washing machines and water-supplied appliances:
- Connect the hot water supply hose to the red-marked valve
- Connect the cold water supply hose to the blue-marked valve
- Hand-tighten connections, then use pliers for an additional quarter-turn
- Insert the drain hose into the drain opening of the supply box
- Ensure the drain hose is secured but not creating an airtight seal
- Run a test cycle and vigilantly check for leaks at all connection points
For gas appliances (dryers, etc.):
- Connect the gas supply line from the appliance to the supply box valve
- Ensure all connections are securely tightened with appropriate wrenches
- Test the gas appliance for proper functionality
- Use Hercules MEGA BUBBLE to check for leaks at the appliance connection
- Follow all manufacturer safety precautions and local regulations
Success indicator: If the appliance runs smoothly through a complete cycle without any leaks at the supply box or appliance connections, you have successfully installed your supply box!
Successfully Installing Your Supply Box
Installing a supply box is a fundamental plumbing skill that ensures reliable water or gas supply for your appliances. By following these nine detailed steps—from choosing the optimal location to testing for leaks—you can complete a professional-quality installation that provides years of trouble-free service.
Key takeaways for successful supply box installation:
- Measure carefully and verify manufacturer specifications for height and placement
- Use proper mounting techniques with secure stud attachment
- Apply Oatey Purple Primer and PVC Cement correctly for watertight connections
- Never skip leak testing before closing walls
- Follow all safety precautions, especially for gas installations
Whether you're installing a washing machine supply box, dryer gas supply box, or utility sink supply box, these professional techniques ensure a secure, code-compliant installation. For additional plumbing tutorials and product information, explore Oatey's complete library of project guides and installation resources.
Published on May 14, 2026
Frequently Asked Questions
-
What is the standard height for a washing machine supply box?
-
The standard height for a washing machine supply box is 36-42 inches from the finished floor to the bottom of the box. This height accommodates most washing machine models and allows easy access to connections. Always verify your specific appliance manufacturer's recommendations before installation.
-
-
Can you install a supply box without solvent welding?
-
No, proper supply box installation with drain connections requires solvent welding for water supply boxes. Solvent welding creates a permanent, watertight seal that prevents leaks. For gas-only supply boxes without drain connections, solvent welding is not required.
-
-
What is the difference between fire-rated and standard MODA boxes?
-
Fire-rated MODA boxes include metal mounting brackets and fire-resistant materials that prevent fire spread through wall penetrations. Standard MODA boxes use plastic brackets and are suitable for non-fire-rated wall assemblies. Check local building codes to determine which type is required for your installation.
-
-
How long does it take to install a supply box?
-
A typical supply box installation takes 2-4 hours for someone with basic plumbing skills. This includes measuring, mounting, connecting drain and supply lines, and testing for leaks. First-time installers should allow additional time for familiarizing themselves with the process.
-
-
Do you need a permit to install a supply box?
-
Permit requirements vary by location. Many jurisdictions require plumbing permits for supply box installations, especially for new construction or when relocating plumbing. Check with your local building department before beginning installation to ensure compliance with local codes.
-