Soldering copper pipe is a fundamental plumbing skill. But even experienced DIYers and pros can fall into bad habits that result in leaks, wasted time, or failed inspections.
Whether you’re a first-time solderer or brushing up on your technique, avoiding these common plumbing soldering errors can make the difference between a clean, watertight joint and a frustrating repair.
Here are six soldering mistakes to watch out for and tips for doing it right.
1. Skipping Surface Prep
If you don’t properly clean and deburr the pipe and fitting, the solder won’t bond. Contaminants like dirt, oil, oxidation, or burrs inside the pipe can prevent the flux and solder from working as intended.
How to prep the pipe and fitting:
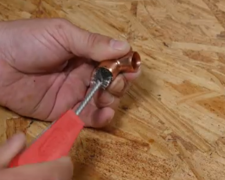
- Deburr pipe: Use a deburring tool to remove any roughness inside the pipe. This ensures smooth water flow and helps prevent turbulence or future corrosion.
- Clean pipe: Clean the outside of the pipe to remove oils and dirt, using an abrasive cloth like Oatey® Plumber’s Abrasive Sandcloth, Oatey® 180 Open Mesh Cloth, Oatey® Nylon Grit Pads, or the Oatey® O.D. Tube Cleaning Brush.
- Polish fittings: Clean the interior of the fitting hub with an Oatey® Heavy Duty Fitting Brush.

2. Using the Wrong Flux or Solder
Selecting the correct type of flux and solder is crucial for a successful soldering job. Various types of solder and fluxes are suited to different applications, and not all solder and flux are safe for potable water applications.
The right solder for plumbing/potable water applications:
- Use Oatey® Safe-Flo®, 95/5, or 97/3 lead-free solders. All are NSF 61-certified and safe for drinking water lines.
- 97/3 is best for copper and brass and has a higher melting point.
These products ensure compliance with safety standards and are designed for reliable performance.
This guide explains the different types of solder, their compositions, applications, and how to pick the right one.
The right flux for plumbing/potable water applications:
- Best all-around: Oatey® No. 95 Tinning Flux pre-tins joints for better flow and helps fill gaps, especially for beginners or larger joints.
- Hot weather: Oatey® No. 5 Hot Weather Flux resists separation in high temperatures.
- Overhead / vertical joints: Hercules® Jel-Flux™ has a no-drip formula that stays in place and meets ASTM B-813.
3. Overheating the Joint
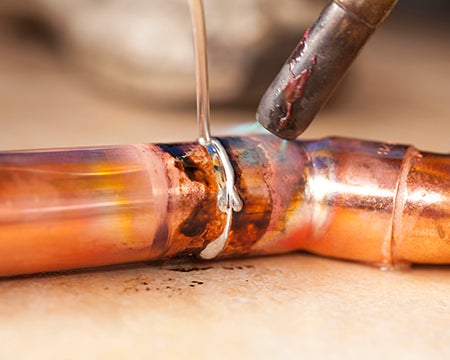
Applying too much heat can burn off the flux, damage the pipe, or prevent solder from flowing. Signs of overheating include a blackened pipe or solder that refuses to melt or run.
How to heat the joint correctly:
The flame should be removed as soon as the solder melts. Be sure to heat the joint evenly and position the flame at a 45-degree angle near the bottom of the fitting hub. Use the appropriate torch tip size for the pipe. A large tip provides excess heat and risks overheating smaller pipes.
- Smaller pipes: Require less heat; use a smaller torch tip.
- Larger pipes: Need more heat; use a larger torch tip for even heating.
Torch tip manufacturers typically recommend the correct tip size for different pipe sizes.

4. Overapplying or Underapplying Flux and Solder
It’s tempting to use a large amount of flux, thinking it will improve the soldering process. However, too much flux can lead to severe problems.
Risks of Excess Flux:
- Corrosion: Excess flux turns into acid when heated, traveling inside the pipe and causing pitting.
- Wasted product: Using more flux than necessary leads to unnecessary waste.
We recommend evenly applying a thin layer of this product with an Oatey® Acid Brush to the copper pipe and the inside of a fitting. Any excess flux should be removed prior to connecting them.
While too much flux is harmful, too little can pose issues.
Importance of Sufficient Flux:
- Flow issues: Insufficient flux can prevent proper solder flow.
- Leak paths: Gaps in flux application can lead to leak paths.
Apply a consistently thin layer to ensure optimal results.
For more tips on applying flux, see our soldering tips and techniques.
5. Not Protecting the Surrounding Area
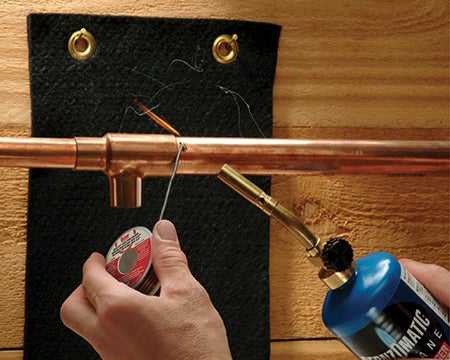
When soldering, especially in older homes, protecting the surroundings is essential. Torch flames can scorch nearby materials, damage finishes, or even start fires, especially when working near wood framing, cabinets, or drywall. Proper protection prevents accidents and ensures safety.
How to protect the area when soldering:
Use a flame-retardant cloth like the Oatey® Flame Protector to shield nearby areas. The Oatey Flame Protector is a non-asbestos flame-retardant cloth that protects studs, walls, floors and other surfaces from flames and sparks when soldering. Made of oxidized polyacrylonitrile (OPAN) fibers, this cloth offers up to 2,280°F of heat protection and is ideal for use with higher-temperature torches, including propane and MAPP gas. Brass eyelets allow for easy hanging from a stud or wall.
Scrap metal can be a temporary barrier in some situations, but it’s harder to position and offers less flexibility.
The flame protector is handy in tight spaces like behind shower valves or inside stud walls.

6. Neglecting Cleanup and Inspection
Neglecting cleanup can lead to long-term corrosion, leaks, or an unprofessional-looking job. While excess flux may seem harmless, it can cause Verdigris, a greenish-blue discoloration commonly found on copper, bronze and brass, to form and destroy copper pipe over time. An old, rusting penny and the Statue of Liberty are great examples of Verdigris in action.
Failing to pressure test your system after soldering increases the risk of undetected leaks.
Proper cleanup and inspection after soldering:
- While the joint is still warm (but not molten), wipe it down with a damp rag to remove excess flux and solder.
- Follow up with a dry cloth to eliminate any remaining residue. This prevents corrosion and gives the joint a clean, finished look.
- Let the joint cool before testing.
- For DIY work, run water and inspect for leaks.
- On larger jobs, consider air testing first. It’s cleaner, and you can rework a leak before water contaminates the joint.
Pro tip: Keep a rag bucket nearby for safe, efficient cleanup.
By avoiding these common mistakes, you’ll achieve professional-quality results every time.
Ready to solder? Check out our step-by-step guide to soldering copper pipes for full instructions.
Frequently Asked Questions
-
Why does my solder joint leak?
-
Leaks often occur due to poor surface prep, insufficient flux, or an overheated joint that burned away the flux before soldering.
-
-
How do I know if I overheated the joint?
-
Look for a blackened surface or solder that beads up or won’t flow. You may also notice the flux boiling off too quickly.
-
-
What happens if I use the wrong flux?
-
Using the wrong flux—such as those that are not NSF approved for potable water systems—can contaminate water lines and may not activate correctly at soldering temperatures.
-
-
How much solder and flux should I use?
-
Use just enough flux to coat the mating surfaces in a thin, even layer. Feed the solder slowly and stop once it has fully surrounded the joint.
-