< Back to Project Guides
Project Guide
How to Install Bathroom Sink Plumbing: Set-up Your Own Bathroom Sink
Difficulty
beginner

Time
< 2 hours

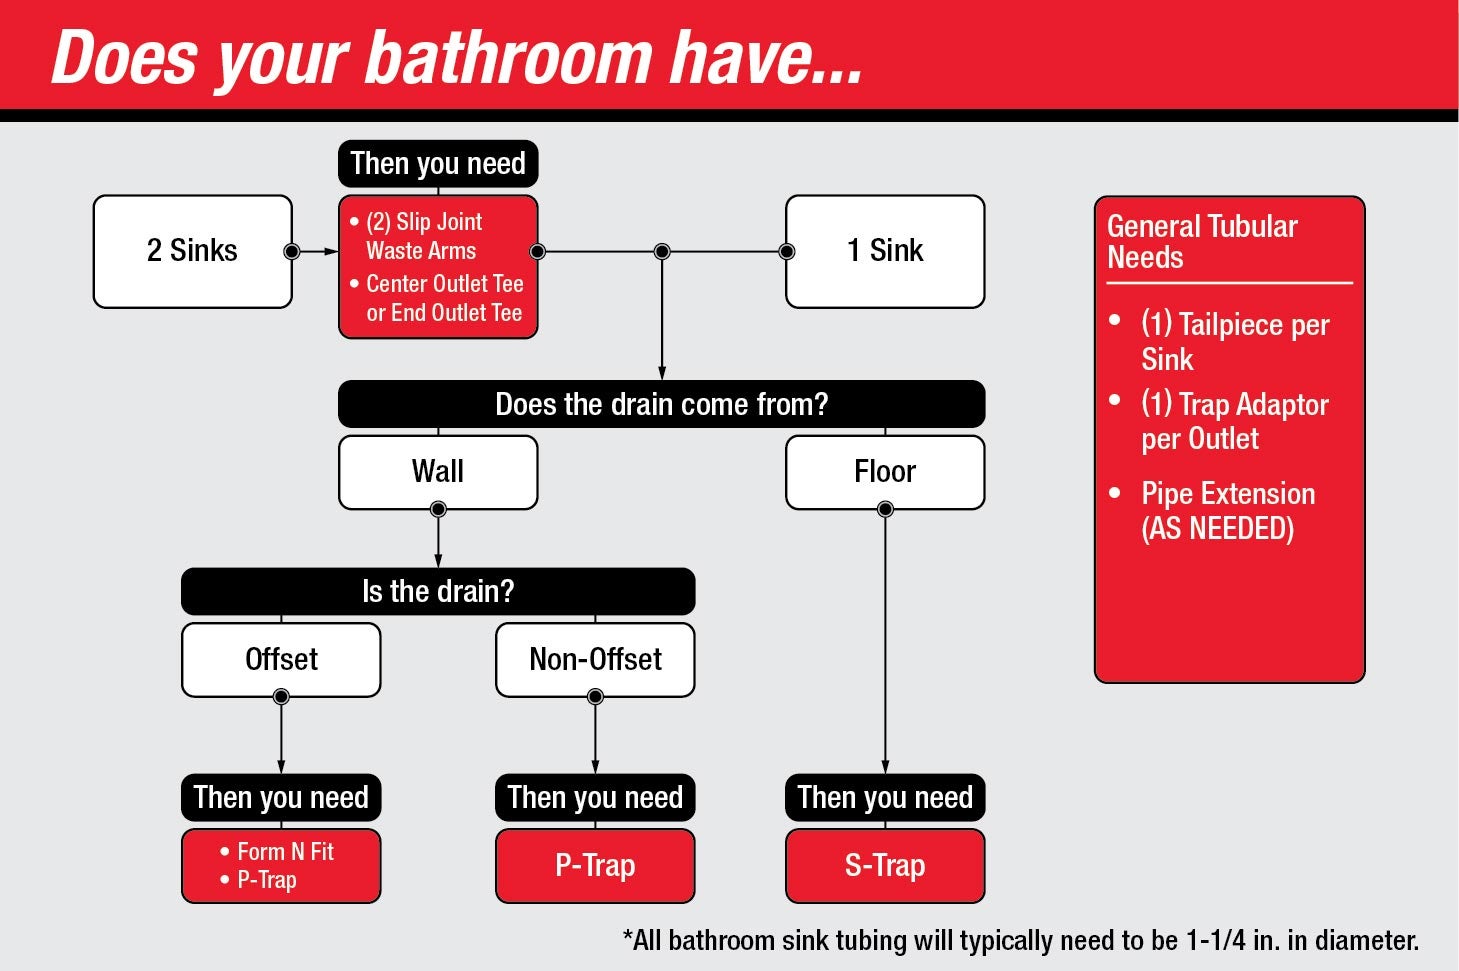
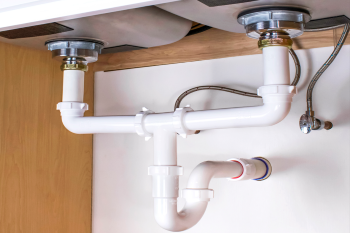
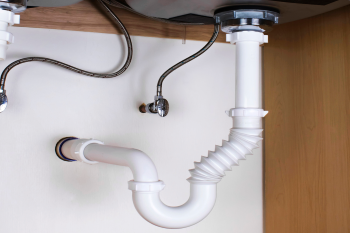
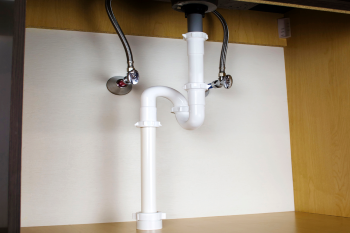
Whether you’re putting in a new sink or simply replacing old piping, Oatey’s catalogue contains all the necessary tubular piping for any type of plumbing scenario. Piping comes in plastic, brass and semi-cast material; although, any type of pipe material can be combined with another. Tubular also comes with and without a cleanout--a fitting that is used to easily access plumbing for cleaning without having to remove the entire fixture. Piping also comes in different diameters, including 1-½ in. (suited for kitchens and laundry rooms) and 1-¼ in. (typically suited for bathrooms).
Note: This guide concerns the application of typical bathroom piping set-ups from under the sink to the wall. All tubing will typically need to be 1-1/4 in. in diameter but check your wall connection.
What You'll Need For This Project
- Pop-Up Drain Assemblies
- Plumber’s Putty
- Pipe Cutter
- Measuring Tape
- Tail Piece
- Trap Adaptor
- Extension (AS NEEDED)
- ADA Safety Covers (OPTIONAL)
- Bathroom-specific piping
Install Pop-Up Drain(s)
Determine What Type of Setup You Have
Attach First Slip Joint Waste Arms
Attach the Center Outlet Tee
Apply Flexible or Standard Extension (IF OFFSET)
Measure & Cut Wall Tube
Install Wall Tube
Install J-Bend
Check for Leaks
Measure & Cut Floor Tube
Install Floor Tube
Install J-Bend
Check for Leaks
Document Downloads
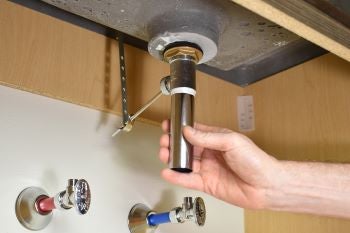
Step 1. Install Pop-Up Drain(s)
This guide assumes that you have already purchased your sink bowl(s) and have existing wall plumbing in place. Regardless of location, all sink plumbing will connect to a drain in the sink bowl. For bathrooms, we recommend Oatey pop-up drains, which can be installed according to these instructions.
Step 2. Determine What Type of Setup You Have
There are many different types of under sink set ups. For instance, the typical plumbing set up has a pipe going straight from the sink into the wall. Sometimes, however, the wall outlet can be offset, requiring a flexible extension tube. In cases where the plumbing outlet is in the floor, such as in an historical home, further plumbing attachments will be needed.
- If you have two sinks with one plumbing outlet, start at step 3.
- If your plumbing outlet is in the wall, head to step 5.
- If your plumbing outlet is in the floor, head to step 10.
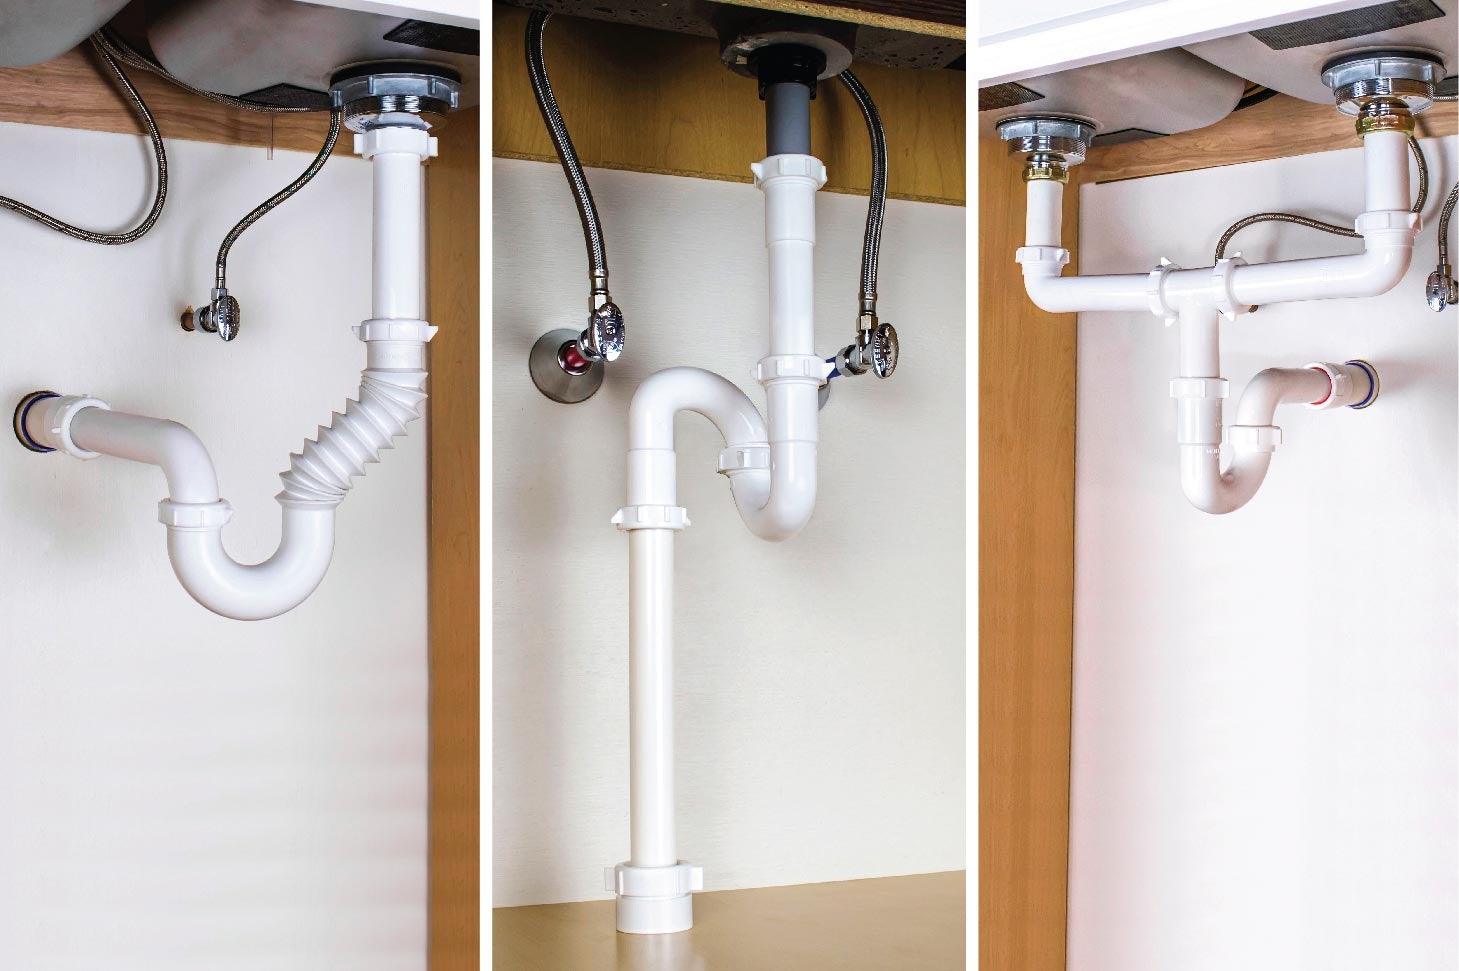
If you have two sinks with individual plumbing outlets, determine their outlet position and head to the appropriate step(s) noted above.
Double Sink Instructions:
If you have two bathroom sinks that connect with one outlet, you will have to merge the two sinks’ piping using:
Or
Note: The plumbing within the wall may need to be reworked depending on the layout of the vanity.

Step 3. Attach First Slip Joint Waste Arms
Slide the nut onto the tailpiece before applying the washer underneath it with the beveled side facing down. Hold the first waste arm onto the tailpiece and screw the nut down onto the arm over the washer.
Next, determine where the waste arm will connect to the tee to determine where to cut. Measure from the center of tailpiece to the tee inlet, then cut the waste arm at that measurement.
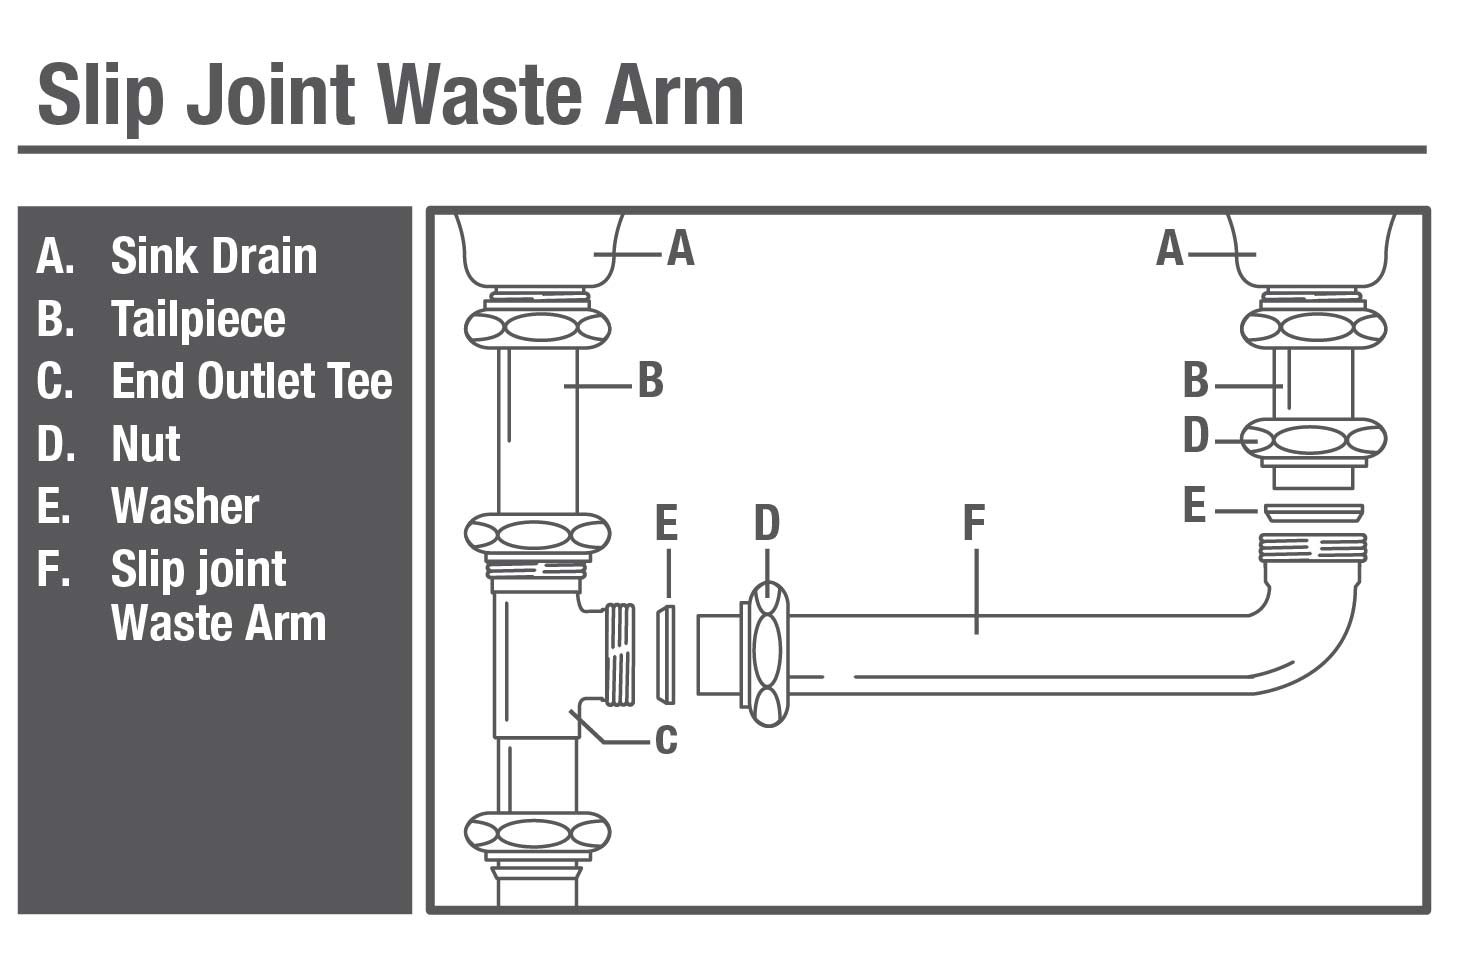
Note: Measuring and cutting the pipe to the correct length is usually necessary, as it rarely matches the exact size of the waste arm.
Step 4. Attach the Center Outlet Tee
Next, attach the outlet tee by sliding the nut and washer onto the end of the first waste arm (with the beveled side of the washer facing outwards again), then screw them into the outlet tee connection. Repeat these steps with the second waste arm.
Once you have assembled the slip joint arms into the center point T junction you are ready to connect the piping to the waste outlet.
- If your plumbing outlet is in the wall, head to step 5.
- If your plumbing outlet is in the floor, head to step 10.
Wall Outlet Instructions:
For situations where your waste outlet empties into plumbing inside the wall, you will need:
- Oatey Form N Fit (IF OFFSET)
- P-Trap Kit

Step 5. Apply Flexible or Standard Extension (IF OFFSET)
If your wall outlet is not directly in line with your tailpiece, it may be offset. This will require you to install a Form N Fit piece to bridge the gap between the end of the tailpiece and the J-bend.
Start by placing the Form N Fit onto the tailpiece by sliding a slip joint nut onto the tailpiece and holding it in place as you slide a washer on underneath it. Hold the Form N Fit up onto the tailpiece and screw the other slip joint nut on top of washer at the tailpiece to J-bend connection.
Note: All washers should be placed with beveled side facing outwards.

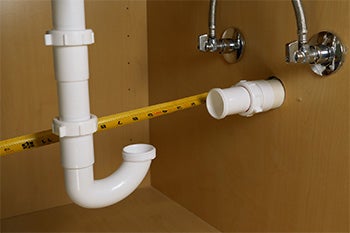
Step 6. Measure & Cut Wall Tube
Measure the required length of the wall tube by holding the J-bend onto the tailpiece and measuring the distance from the wall tube outlet to the end of the J-bend. Mark your wall tube at the distance measured and cut the tube at the mark with a pipe cutter. Remove the J-bend, for you will not be installing it yet.
Step 7. Install Wall Tube
Place nuts and washer on wall tube in order of smallest nut first, then larger nuts (slip joint nut, trap adapter nut) and finally the washer on top. When the tube is inserted into the wall outlet, the larger nut should be screwed over the washer at the connection between tube and outlet, while the smaller nut hangs over the other end of the tube where the J-bend will connect.
Step 8. Install J-Bend
Slide the slip joint nut onto the tailpiece and hold it in place as you slide a washer on underneath it. Slide the J-bend up onto the tailpiece and screw the slip joint nut on top of the washer at the tailpiece to J-bend connection. At the other end, screw the slip joint nut from the wall tube onto the J-bend to wall tube connection.

Tip: Click here to watch how to install a P-Trap.
Step 9. Check for Leaks
Place a tray underneath the pipes and check for leaks by running water for a minute or two and observing the plumbing connections for drips.
Tip: If there are leaks, tighten the nut. Do NOT over tighten. Take off the nut and reseat the washer if needed.
Floor Outlet Instructions:
Although floor outlet connections are typically outdated and not code compliant, bathroom plumbing in old houses may find this a common occurrence. Typically, for plumbing in this situation you will need:

Step 10. Measure & Cut Floor Tube
To start, hold the J-bend onto the tailpiece and measure the distance from the floor waste outlet to the end of the J-bend. Add an extra inch to the measurement. This way, the pipe extends into the adapter far enough to make a seal. Mark your S-curve tube at the distance measured and cut the tube at the mark with a pipe cutter. Remove the J-bend.

Step 11. Install Floor Tube
Place nuts and washer on S-curve tube in order of smallest nut first, then larger nut (slip joint nut, trap adapter nut) and finally put the washer on top. When the tube is inserted into the floor outlet, the larger nut should be screwed over the washer at the connection between tube and outlet, while the smaller nut hangs over the other end of the tube where the J-bend will connect.
Step 12. Install J-Bend
Slide slip joint nut onto the tailpiece and hold it in place as you slide a washer on underneath it. Slide J-bend up onto tailpiece and screw the slip joint nut on top of the washer at the tailpiece to J-bend connection. At the other end, screw the slip joint nut from the S-curve tube onto the J-bend to connect.

Step 13. Check for Leaks
Place a tray underneath the pipes and check for leaks by running water for a minute or two. Observe the plumbing connections for drips.
Tip: If there are leaks, tighten the nut. Do NOT over tighten. Take off the nut and reseat the washer if needed.
For more information about sink plumbing, check out our blog and case study on ADA pipe wrap.
Document Downloads (3)
Published on January 31, 2023