Difficulty
beginner

Time
< 2 hours

Solvent welding is one of the most reliable methods for joining plastic pipe and fittings in DWV (drain, waste, and vent) and potable water systems. When performed correctly, the fusion created between the pipe and fitting is often the strongest part of the system.
Although solvent cement is commonly referred to as “glue,” it does not simply bond two parts together. Instead, solvent cement chemically softens and fuses the pipe and fitting into a single, continuous piece of plastic. This process creates a durable, long-lasting connection when proper preparation, application, and assembly steps are followed.
This hands-on project guide walks through the complete solvent welding process for ABS, PVC, and CPVC pipe, including pipe preparation, primer and cement application, assembly techniques, and curing considerations.
For a broader overview of how to select and apply solvent cement, refer to How to Solvent Weld PVC, CPVC, and ABS Pipe.
What You'll Need For This Project
- Pipe (ABS, PVC, or CPVC)
- Fittings
- Solvent cement
- Pipe cleaner
- Primer (required for PVC and CPVC; do not use on ABS)
- Plastic pipe cutter
- Deburring tool
- Chamfering tool
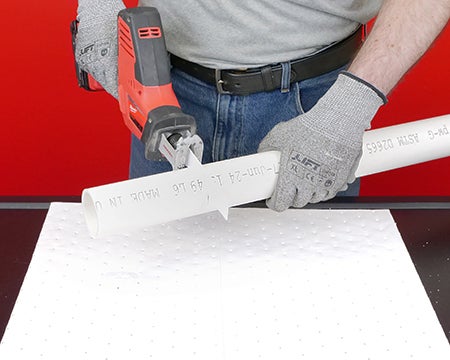
Step 1. Cut, deburr, and chamfer the pipe
The pipe must be cut square to ensure full and even contact inside the fitting hub. A crooked cut can reduce the surface area available for fusion and lead to weak joints.
After cutting the pipe to the desired length:
- Deburr the inside edge of the pipe to remove sharp edges and plastic shavings.
- Chamfer the outside perimeter of the pipe to create a slight bevel.
- Remove all dirt and debris from the pipe end.
Deburring helps prevent flow restriction and removes loose material. Chamfering allows the pipe to enter the fitting smoothly without scraping cement off the pipe during assembly.
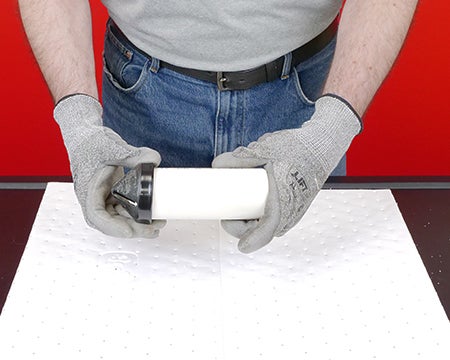
Step 2. Dry fit the pipe and fitting
Dry fitting ensures the pipe is cut to the correct length and helps prevent alignment issues once cement is applied, at which point adjustments must be made quickly. Insert the pipe into the fitting hub without cement to confirm proper fit and alignment before solvent welding.
Oatey Tip: The pipe should slide easily one-third to two-thirds of the way into the fitting hub before resistance is felt. This resistance indicates proper interference between the pipe and fitting.
Step 3. Clean the pipe and fitting hub
If cementing onto existing pipe, use a cleaner on:
- the exterior of the pipe
- the interior of the fitting hub
Cleaners remove dirt, grease, and grime that can interfere with the chemical fusion process. Contaminants left on the pipe or fitting can prevent proper softening and bonding.
Cleaner is not required on new pipe. In those cases, simply wipe away surface dirt or dust with a clean rag before proceeding.
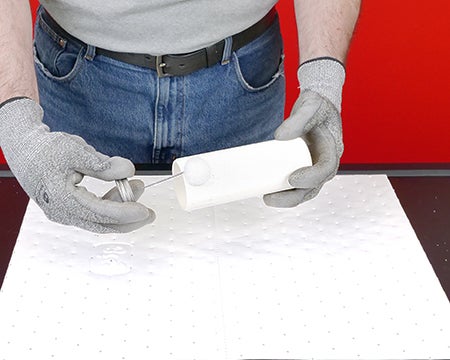
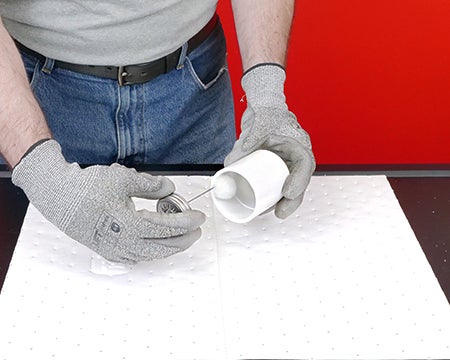
Step 4. Apply primer (PVC and CPVC Only)
Primer is required when working with PVC or CPVC pipe and fittings. It softens and prepares the plastic surface, allowing the solvent cement to penetrate and fuse the materials effectively.
Apply primer in the following sequence:
- To the inside of the fitting hub.
- Re-dip the applicator and apply primer to the exterior of the pipe end.
- Re-dip again and apply primer once more to the inside of the fitting hub.
This sequence ensures both mating surfaces are fully conditioned for cementing.
Important: Do not use primer on ABS pipe or fittings.
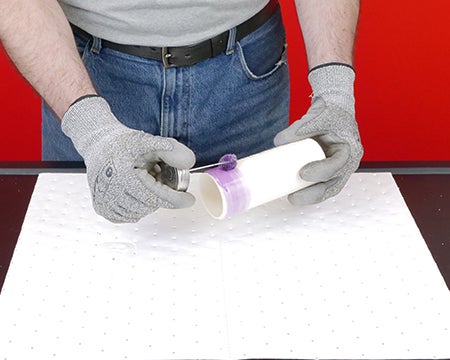
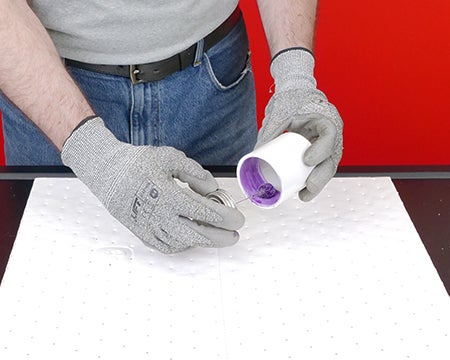
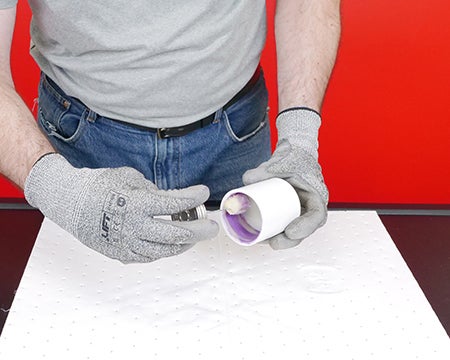
Step 5. Apply solvent cement
Apply a liberal coat of solvent cement to the exterior of the pipe end, extending beyond the depth of the fitting hub. This ensures full coverage once the pipe is inserted.
Important: Cement must be applied while the primer is still wet. The joint must be assembled within five minutes of primer application to ensure proper softening and fusion.
For ABS, PVC, and CPVC applications:
- Apply cement to the exterior of the pipe end.
- Without re-dipping, apply cement to the inside of the fitting hub.
- Re-dip and apply a second coat to the exterior of the pipe end.
Applying cement in this order promotes even distribution and consistent fusion between the pipe and fitting.
Oatey Tip: Stir or shake cement thoroughly before use to maintain uniform consistency.
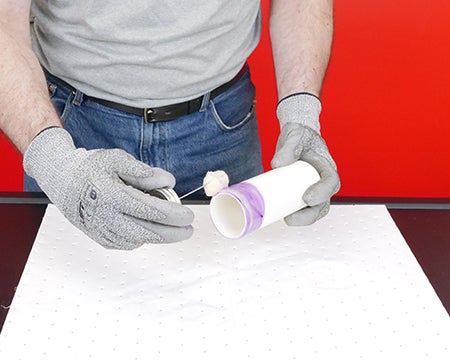
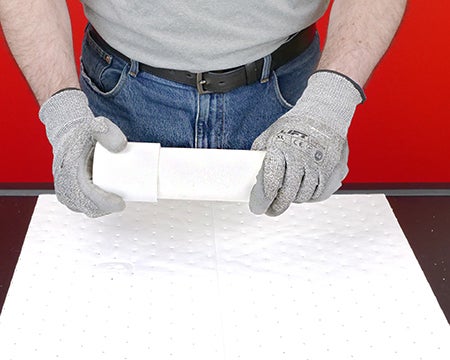
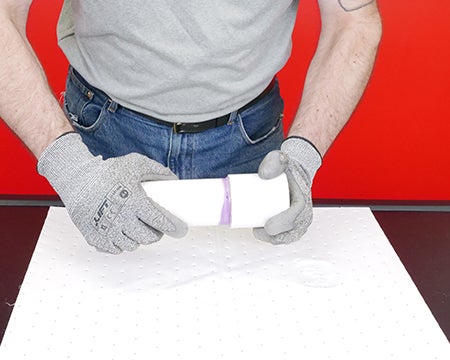
Step 6. Assemble the joint
Insert the pipe into the fitting hub while rotating it one-quarter turn. This motion helps evenly distribute the cement around the joint.
Push the pipe fully into the fitting until it bottoms out, then hold the joint together for 30 seconds to prevent push-out. Push-out occurs when hydraulic pressure forces the pipe back out of the fitting before the cement sets.
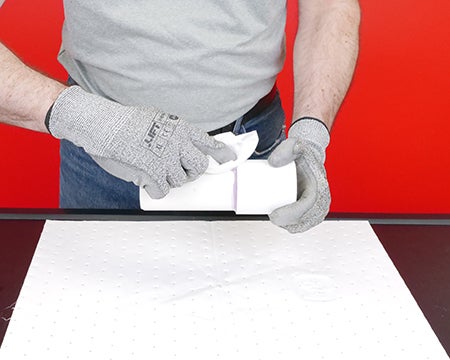
Once assembled:
- Wipe away any excess cement that squeezes out of the joint.
Removing excess cement improves appearance and helps prevent buildup that can harden on the pipe surface.
Important: Assemble parts quickly. The cement must remain fluid. Once cement has dried, it cannot be re-coated.
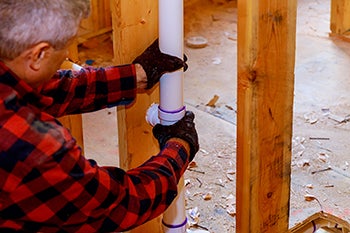
Step 7. Allow proper cure time before testing
Allow the cemented joint to cure fully before testing or placing the system into service. Cure time varies depending on pipe size, temperature, humidity, and application. Lower temperatures and larger-diameter pipe may require additional hold time and extended curing before testing.
Premature or improper testing can compromise joint integrity and pose safety hazards. Review solvent cement cure-time guidance before testing or placing the system into service.
Important: Do not test solvent-welded joints with compressed air or gas.
Choosing the Right Solvent Cement
There are a variety of solvent cements formulated for different pipe materials, diameters, and applications. Selecting the correct cement is critical to achieving a strong, reliable solvent-welded joint.
Cement choice depends on several factors, including:
- Pipe material (ABS, PVC, or CPVC)
- Pipe size and wall thickness
- Pressure or non-pressure system requirements
PVC, CPVC, and ABS each require a specific cement formulation to soften and fuse the materials properly. For example, PVC applications commonly use Oatey® Medium Clear PVC Cement or Oatey® Heavy Duty Clear PVC Cement, while CPVC systems may require Oatey® Medium Orange CPVC Cement or Oatey® FlowGuard Gold® 1-Step Yellow Cement. ABS systems use ABS-specific cements and do not require primer.
Cement body also matters. Medium- and heavy-bodied cements are designed for larger-diameter pipe. Certain formulas are approved for pressure systems, wet conditions, or fast-set applications. Not all solvent cements are interchangeable, and using the wrong cement for the pipe material can result in incomplete fusion or joint failure.
For help selecting the correct cement for your pipe material, size, and application conditions, see How to Choose the Right Solvent Cement for the Job.
Mistakes to Avoid
Avoiding common mistakes during solvent welding helps ensure proper fusion and long-term joint performance.
- Skipping deburring or chamfering: Sharp edges can scrape cement off the pipe during insertion, reducing the bonded surface area inside the fitting.
- Using primer on ABS pipe: Primer is not designed for ABS and can interfere with proper fusion. ABS relies on solvent cement only.
- Allowing primer or cement to dry before assembly: Solvent welding requires the cement to remain fluid. Dried cement cannot be reactivated or re-coated.
- Not holding the joint long enough: Failing to hold the pipe in place can cause push-out before the cement sets, weakening the joint.
- Using the wrong cement for the pipe material: Not all cements are interchangeable. Using an incompatible cement can result in incomplete fusion or joint failure.
- Testing too soon or with compressed air: Solvent-welded joints must fully cure and should never be tested with compressed air or gas.
For more troubleshooting guidance, see 5 Common Solvent Welding Mistakes to Avoid.
Published on June 05, 2026
Frequently Asked Questions
-
What is solvent welding?
-
Solvent welding is a process that chemically softens and fuses plastic pipe and fittings using solvent cement, creating a single continuous piece rather than a glued joint.
-
-
Is primer required for all plastic pipe?
-
No. Primer is often required for PVC and CPVC pipe and fittings, but should never be used on ABS. Check local codes before use.
-
-
How long should I wait before testing a solvent-welded joint?
-
Cure time depends on pipe size, temperature, and application. Always follow published cure time guidelines and allow the joint to cure fully before testing.
-
-
Why is chamfering the pipe important?
-
Chamfering helps the pipe enter the fitting smoothly and prevents cement from being scraped away during assembly, thereby ensuring proper fusion.
-
-
Can solvent-welded joints be tested with air?
-
No. Solvent-welded joints should never be tested with compressed air or gas.
-