

This guide reflects best practices used by professional plumbers and guidance from Oatey plumbing experts.
To install a P-trap, connect the sink tailpiece to the trap bend, attach the wall tube, tighten the slip-joint connections, and test for leaks. Most DIYers can install or replace a P-trap in about 30–45 minutes using a standard slip-joint P-trap kit and basic hand tools. A properly installed P-trap (sink trap) blocks sewer gases, helps prevent odors, and allows smooth drainage, while keeping your plumbing compliant with modern code requirements.
This guide covers how to remove an old P-trap, size and assemble a new one, and test for leaks, whether you’re working on a bathroom sink or kitchen sink.
What Is a P-Trap (and Why It Matters)?
A P-trap is the U-shaped section of drain pipe under a sink. It holds a small amount of water in the bend, creating a water seal that:
- Blocks sewer gas from entering your home
- Helps stop odors from the drain
- Allows wastewater to drain properly
- Meets plumbing-code requirements in most jurisdictions (unlike many S-traps)
What You'll Need For This Project
- P-trap kit (PVC or tubular plastic trap assembly)
- Adjustable wrench
- Pipe cutter or hacksaw
- Small bucket
Step 1. Turn Off Water and Prep the Area
Locate the shut-off valve under your sink and turn it clockwise to shut off the water supply. This step is crucial to do before beginning work to avoid accidental leaks.
- Clear the cabinet area for space and visibility
- If you’ll be moving supply lines or working in a tight cabinet, you can shut off the sink’s water valves (turn clockwise)
Tip: Run the faucet briefly to confirm shutoffs are closed and relieve pressure.
Step 2. Remove the Existing P-Trap
- Place a bucket directly under the trap bend.
- Loosen the slip nuts (usually one at the sink tailpiece and one at the wall/trap adapter).
- Carefully lower the trap and drain the water into the bucket.
- Remove the old washers and clean the connection points.
If metal fittings are stuck: Use penetrating oil and gentle pressure. If parts are severely corroded, replacement may be the safest option.
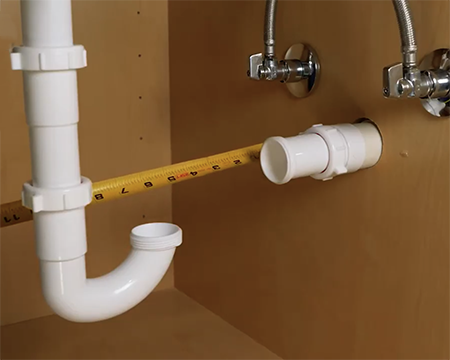
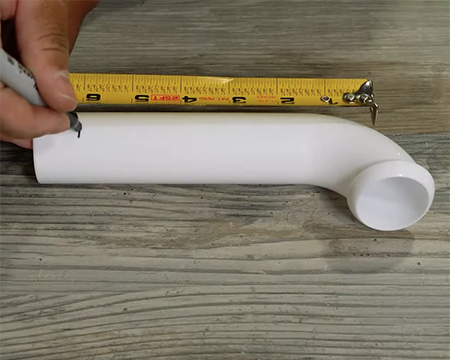
Step 3. Measure and Cut the Wall Tube
Temporarily attach the J-bend to the sink's tailpiece to take an accurate measurement. Hold the wall tube in position between the J-bend and the waste connector, then mark the correct length with a marker.
Use a pipe cutter or hacksaw to trim the wall tube to size.
Pro Tip: Always measure twice and cut once to avoid costly mistakes and wasted materials.
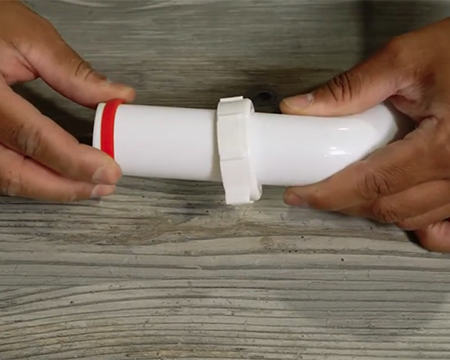
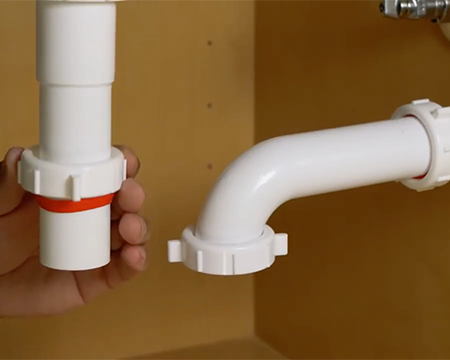
Step 4. Prepare the Wall Tube with Slip Joint Hardware
Slide a slip joint nut and slip joint washer (included in your P-trap kit) onto the wall tube before assembly. The nut goes on first, followed by the washer, with the tapered side of the washer facing the fitting.
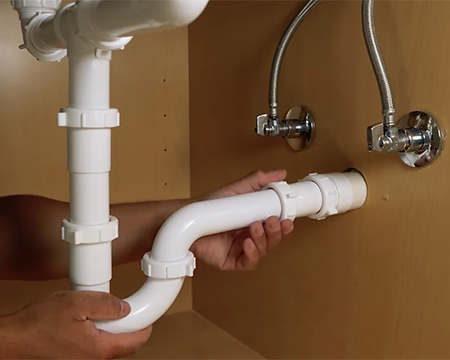
Step 5. Connect the Wall Tube to the Waste Connector
Insert the wall tube into the waste connector (the drain stub-out in the wall). Push the slip joint washer into position to create a watertight seal, then hand-tighten the nut. Finish with a quarter-turn using pliers, snug, but not overtightened.
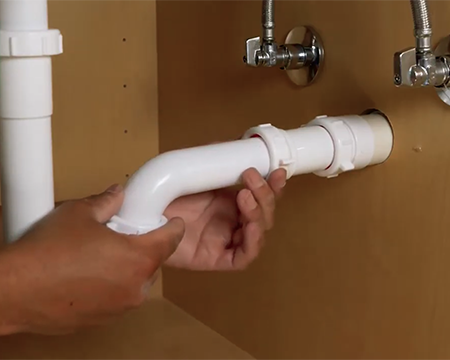
Step 6. Connect the Tailpiece to the J-Bend
Position a slip joint nut and washer on the sink tailpiece. Insert the tailpiece into the J-bend, seat the washer against the fitting, and tighten the nut securely. Also tighten the nut connecting the J-bend to the wall tube at this stage.
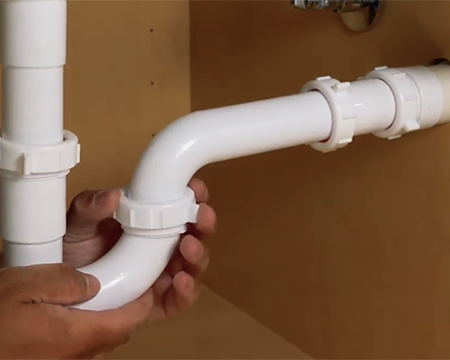
Step 7. Final Tightening — Check All Connections
Go back and check every nut on the P-trap assembly:
- Tailpiece-to-J-bend connection
- J-bend-to-wall-tube connection
- Wall-tube-to-waste-connector connection
Tighten each one snugly by hand, then firm up with pliers if needed.
Important: Do not overtighten. Excessive force can crack plastic fittings or strip threads, causing leaks.
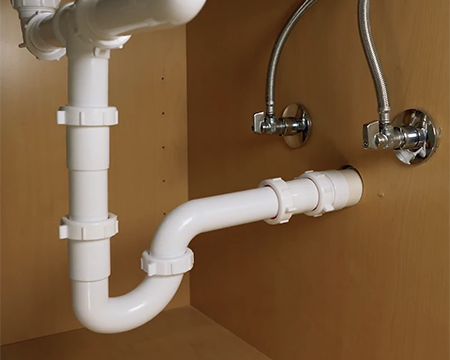
Step 8. Test the P-Trap for Leaks
Turn the water supply back on and run water for 30–60 seconds. Inspect every connection point for drips or moisture. If a leak appears, tighten the nearest nut slightly until it stops.
No leaks? Your P-trap installation is complete.
Published on June 04, 2026
Frequently Asked Questions
-
Can I install a P-trap myself?
-
Yes. Most homeowners can replace a P-trap with a slip-joint kit using basic tools, careful measuring, and proper washer placement.
-
-
What size P-trap do I need?
-
Most bathroom sinks use 1-1/4", and most kitchen sinks use 1-1/2". Measure the drain diameter or match the existing trap size.
-
-
Do I need plumber’s tape for a P-trap?
-
Usually, no. Slip-joint connections seal with washers, not thread tape. Tape is for threaded pipe joints, not slip nuts.
-
-
Can a P-trap be installed backwards?
-
If assembled incorrectly, drainage can suffer and leaks may occur. The inlet connects to the sink tailpiece, and the outlet connects to the wall/trap arm. The trap bend must form a proper water seal.
-
-
What’s the difference between a P-trap and an S-trap?
-
A P-trap drains horizontally into the wall and is standard under modern codes. An S-trap drops through the floor and can siphon dry, allowing sewer gas into the home—so it’s often not code-compliant.
-